Starcoin Eco-benefits: Cross-Chain Guide to Fast-Track Ethereum Learning
In Web3’s grand voyage era, public chains empower data decentralization, and cross-chains break data silos. Therefore, cross-chain is one of the essential basic components of every public chain ecology and an important dimension to measure the maturity of a public chain ecology. Starcoin ecology will soon launch the first decentralized Poly cross-chain bridge to achieve interoperability with Ethereum. This is a milestone that marks the maturity of the Starcoin ecosystem and the first interoperability between the Move ecosystem and Solidity ecosystem.
With the benefits of the cross-chain bridge, let’s take a quick look at how cross-chain is achieved between Starcoin and Ethereum, using USDT as an example.
Preparation Stage
Cross-chaining USDT from Ethereum to Starcoin using Poly Network requires the use of two public chain wallets, MetaMask and StarMask.
1. MetaMask Wallet
Download MetaMask wallet, create an account or import an account, and transfer USDT to the account. For MetaMask download and installation tutorial, please refer to MetaMask official website.
2. StarMask Wallet
You will need to know about StarMask, the official Chrome browser plug-in wallet provided by Starcoin.
StarMask is available for download at https://chrome.google.com/webstore/detail/starmask/mfhbebgoclkghebffdldpobeajmbecfk
Tutorials
After installing StarMask, please familiarize yourself with StarMask’s operation guide. After understanding MetaMask and StarMask, the prep work is done.
Cross-Chain Guide
After installing StarMask and MetaMask wallets and preparing USDT, the preparations are ready.
Next, we have to cross-chain.
1. Go to the official website
First, go to the official website of Poly Network Cross-Link Bridge at Main Network.
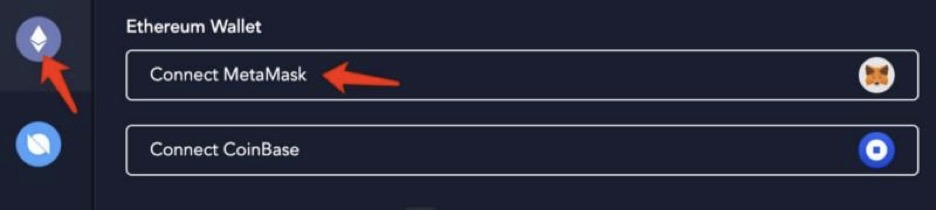
2.Connect Wallet
Connecting to a wallet.

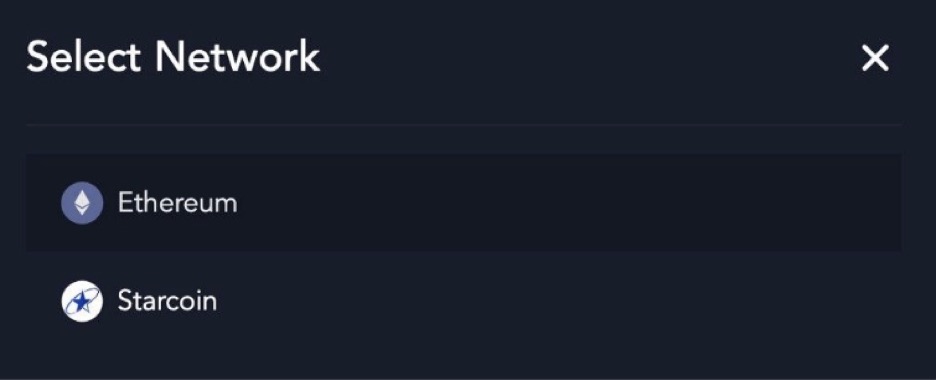
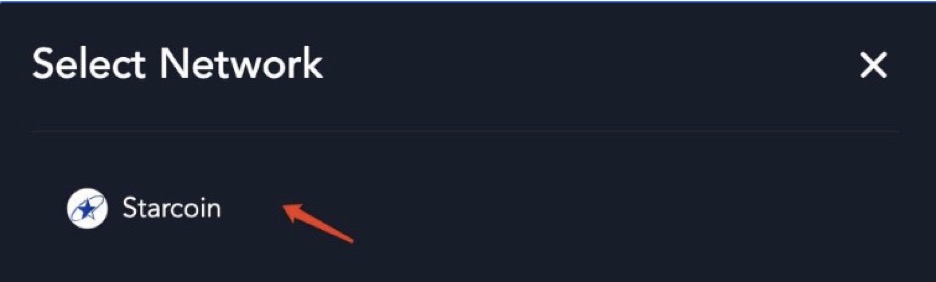
Select Ethereum and MetaMask.
Select Starcoin and StarMask.
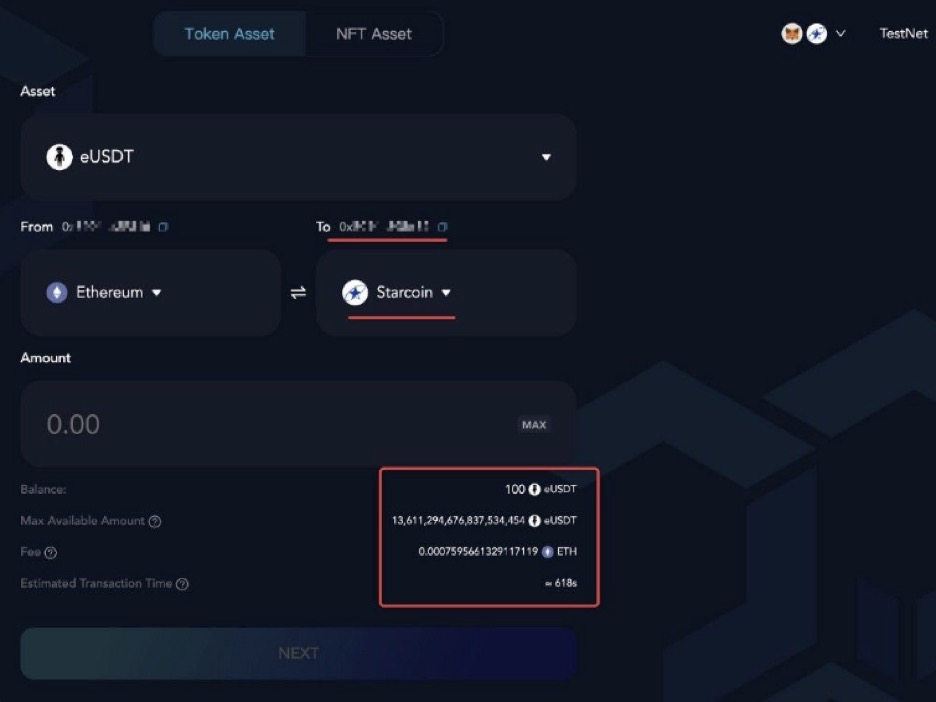
3. Selecting Assets Across Chains
SelectTokenAsset, Then select the assets that need to be cross-chained.
The asset we have chosen here to cross-chain assets is USDT.
4. Select cross-chain direction
Starcoin and Ethereum are two-way interoperable, users can either freely cross-chain from Starcoin to Ethereum or choose to freely cross-chain from Ethereum to Starcoin. here is an example of Ethereum cross-eUSDT to Starcoin. As shown in the figure.
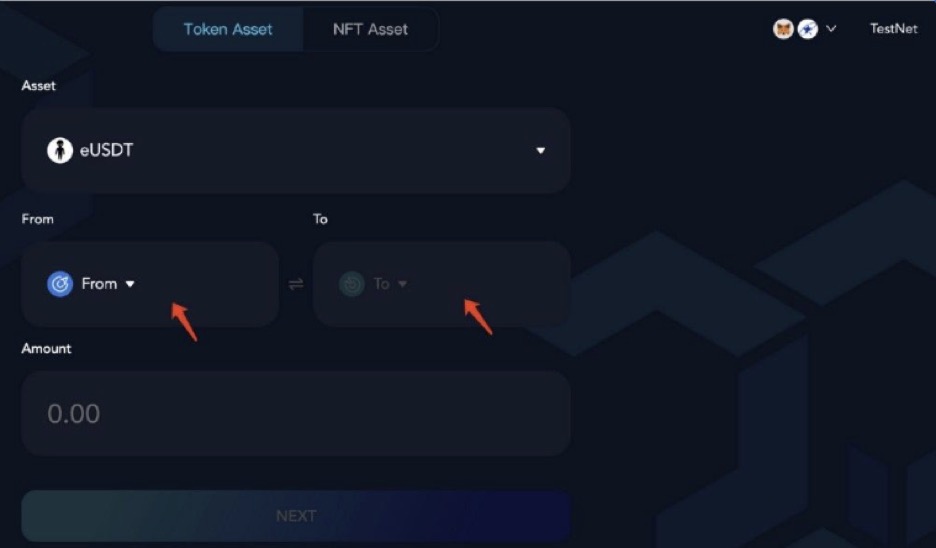
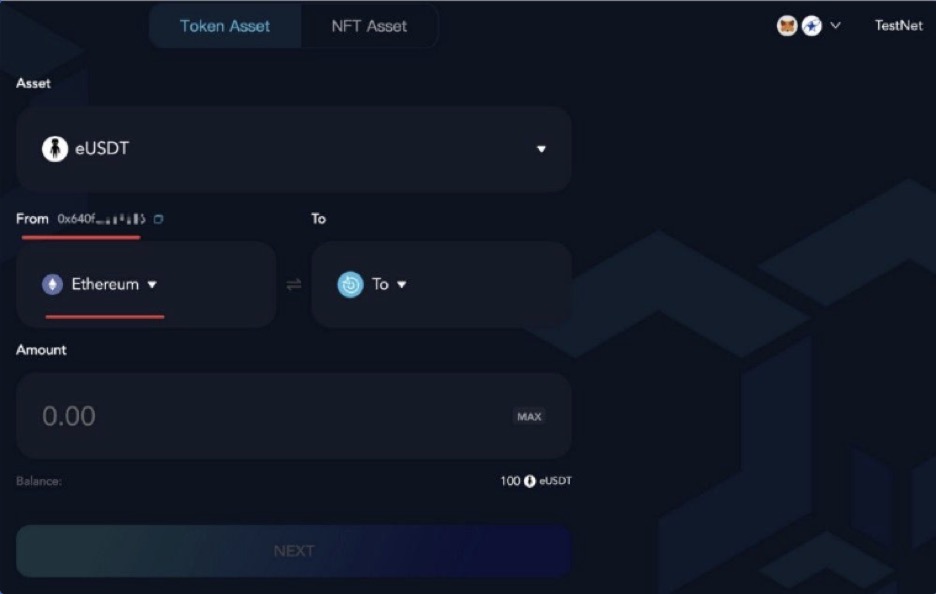
Set the source chain From:
After successful setup, you should be able to see the following screen:
Set the target chain to:
After a successful setup of the previous step, you should be able to see the following screen:
5. Set the amount of money allowed to be transferred
Once the previous settings are set, enter the amount you want to cross-chain, either by clicking MAXto cross-chain all the USDT in your MetaMask wallet, or by directly entering the amount you want to cross-chain.
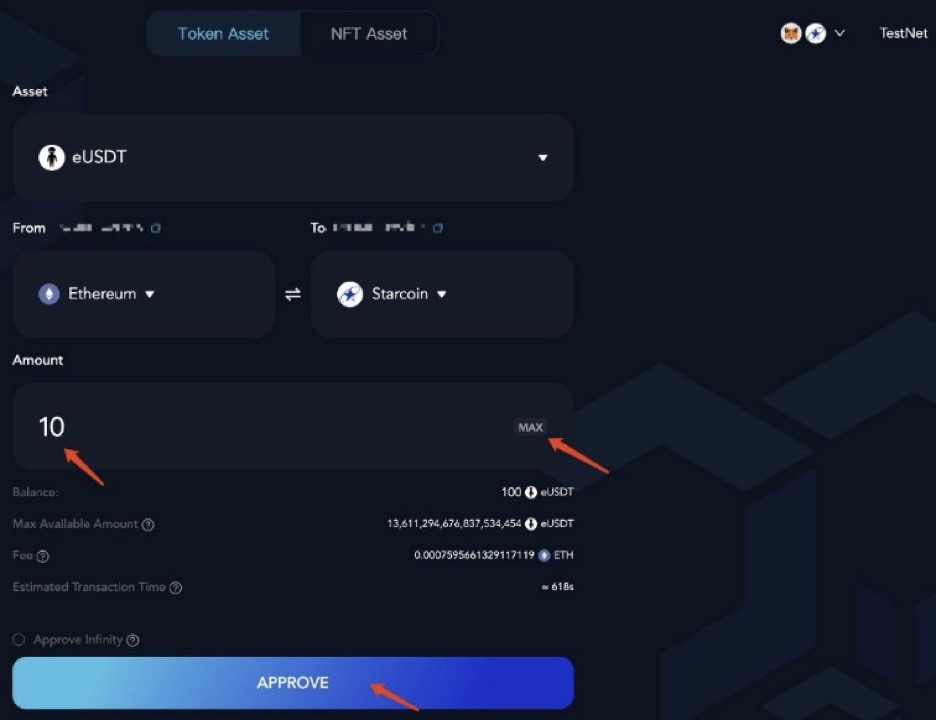
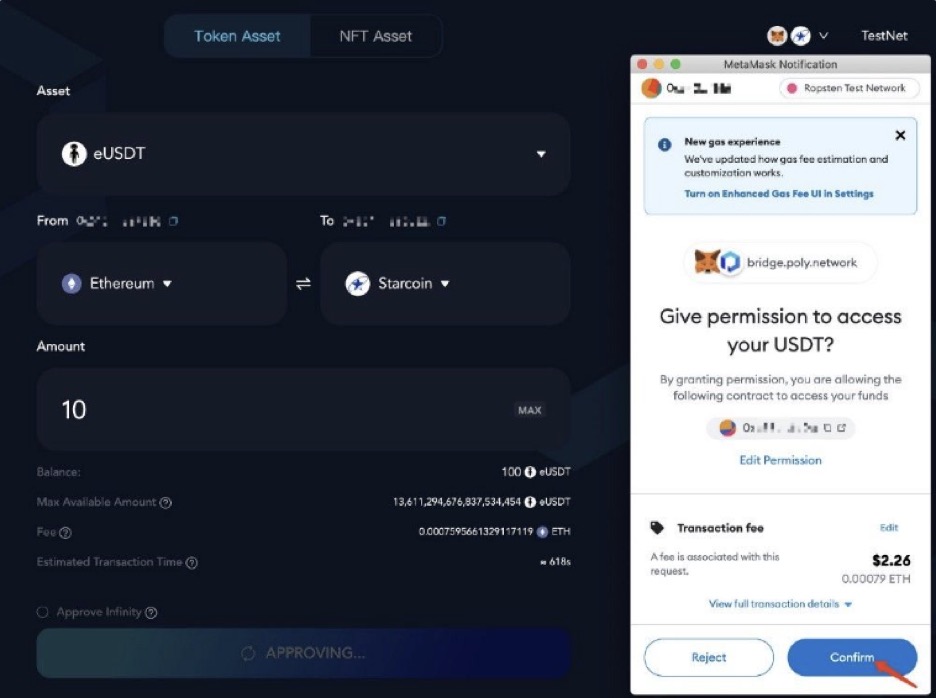
Then click the APPROVE button to invoke the MetaMask wallet, sign and submit the transaction:
The following diagram shows the status of a transaction in processing:
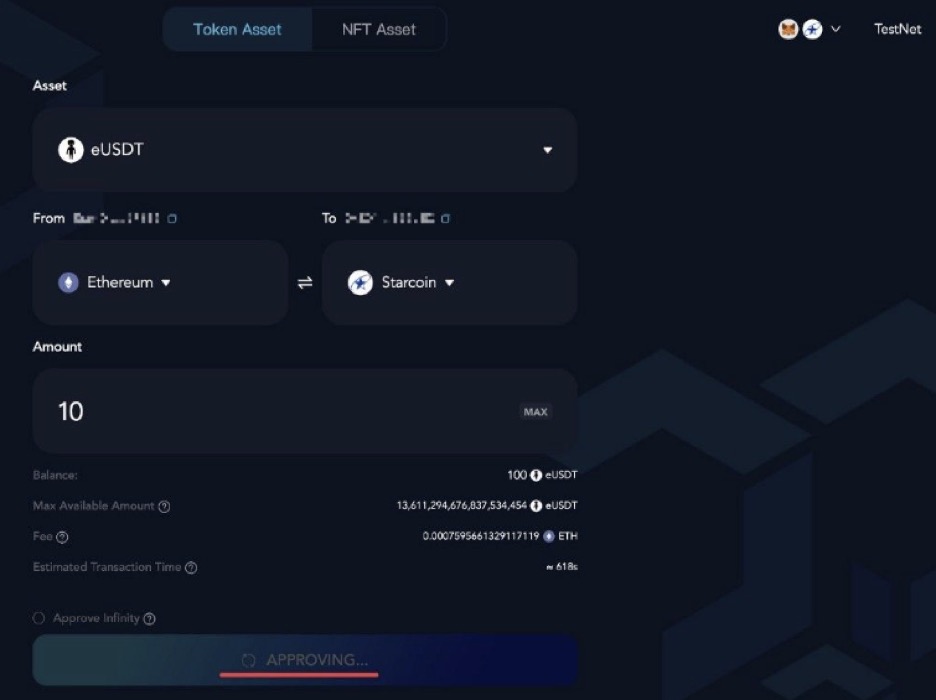
Note that Aprove is a step that needs to be performed when crossing out ERC20 protocol tokens from Ether, which does not exist when crossing out ETH from Ether.
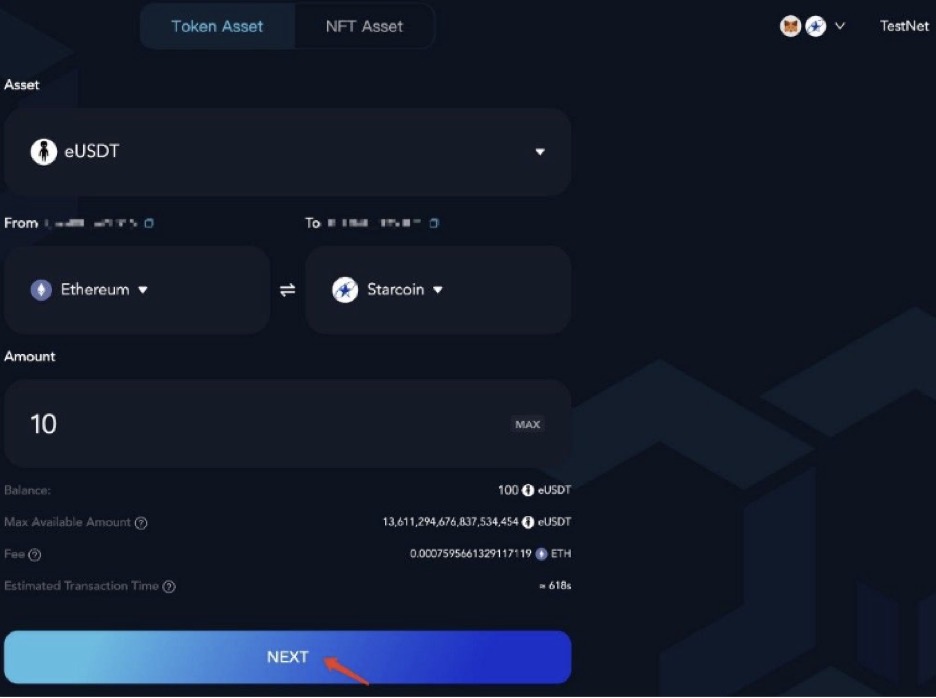
6. Initiate cross-chain
After the previous step is completed, you will enter the following page, click NEXT, and here you will really enter the process of the cross-chain transaction.
Going to the confirmation page of the transaction details, 10 USDT will be cross-chained from Ether to Starcoin:
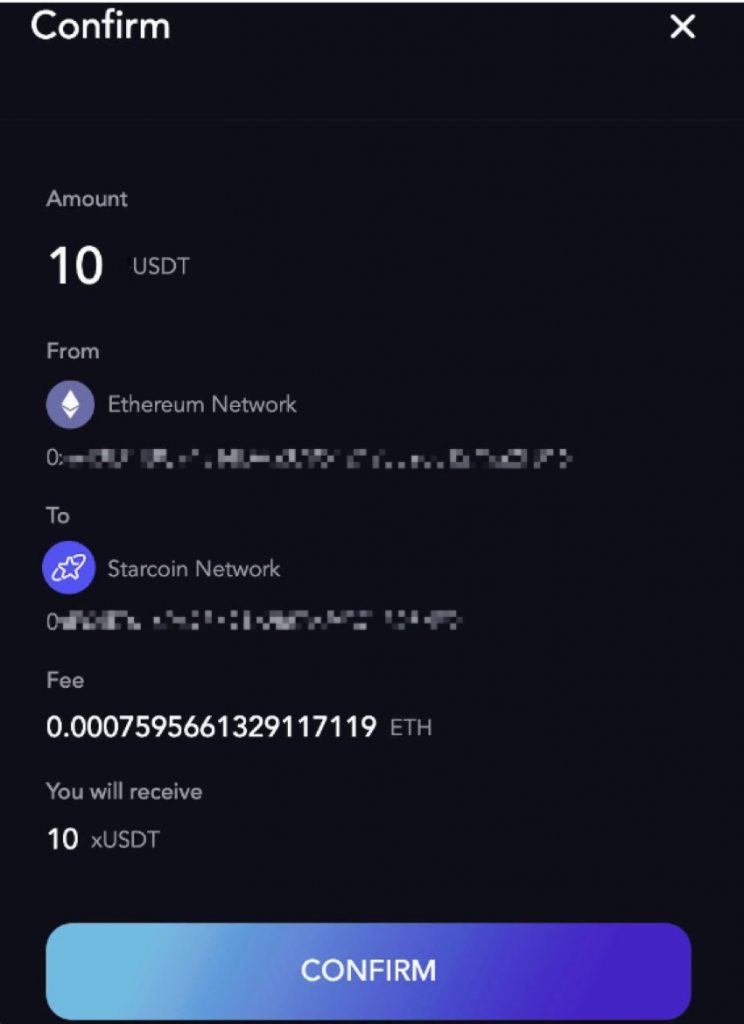
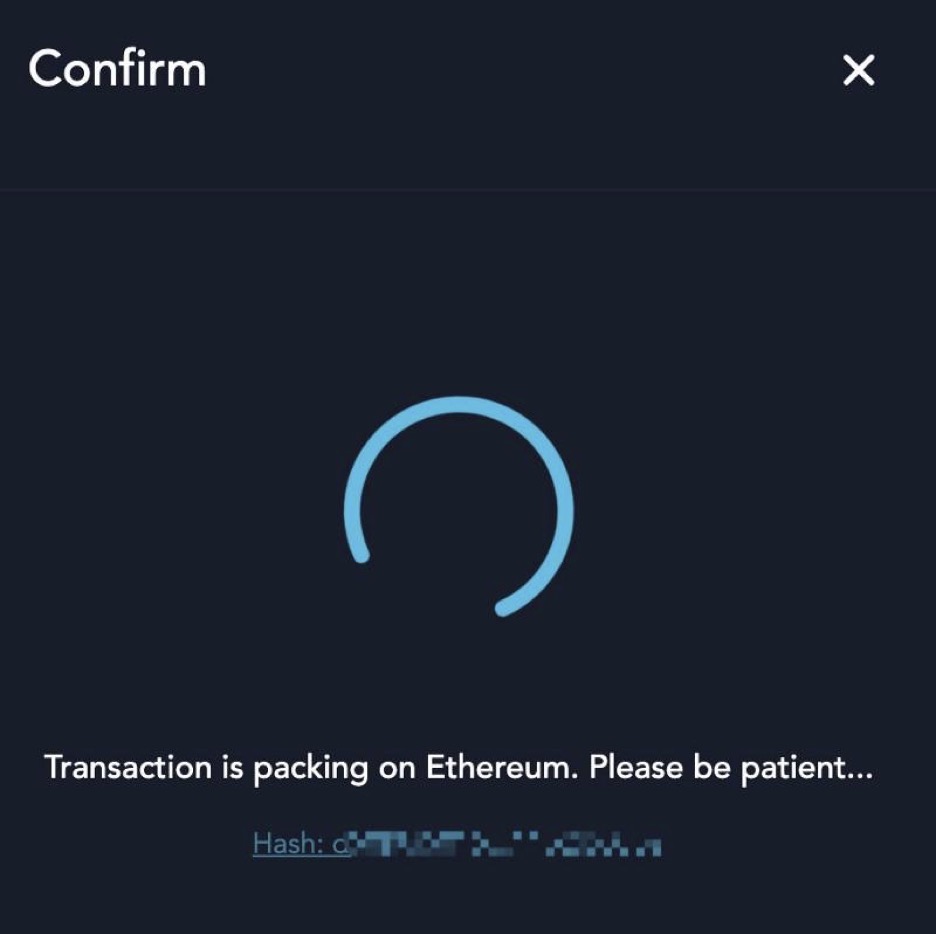
Click on the CONFIRM button to evoke MetaMask, sign and initiate a real cross-chain transaction:
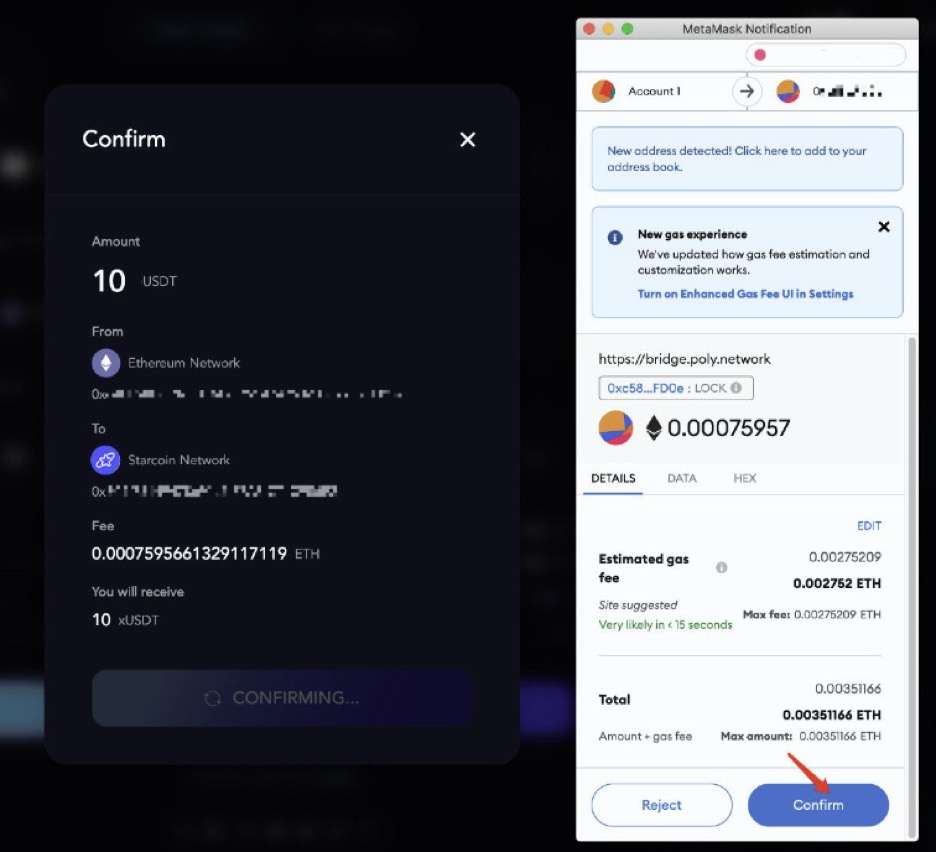
Transactions wait in the transaction pool to be packaged, depending on the network congestion.
The status of transactions can also be viewed via MetaMask at:
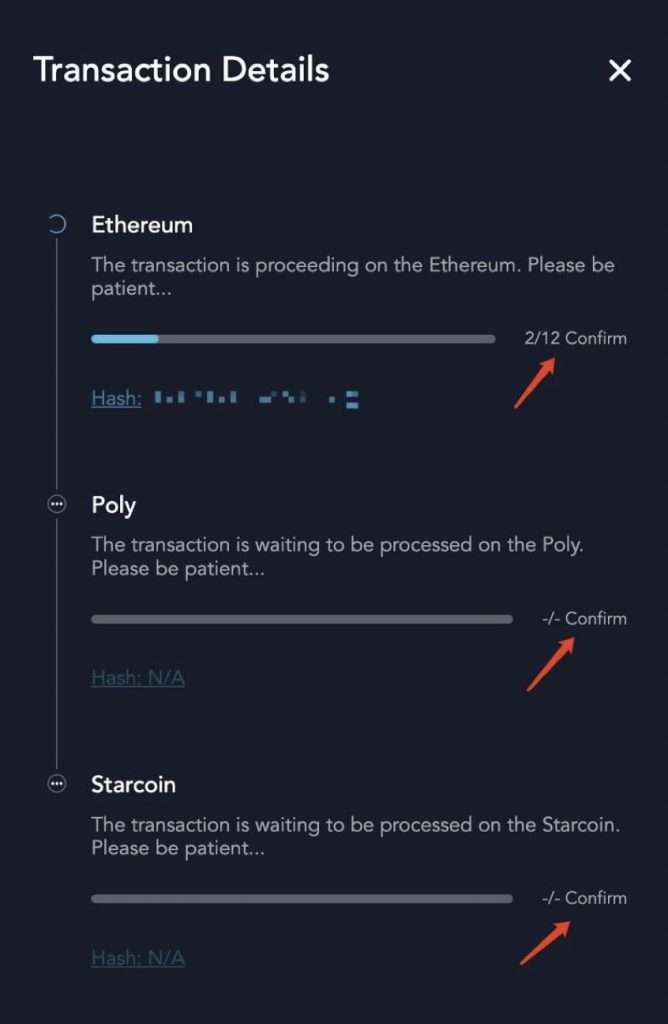
After the transaction is packed into the block, it will jump to the block confirmation page as shown in the figure and wait for the transaction to enter the finality (security) state, which normally takes 6–10 minutes for the whole process. As you can see from the block confirmation page, the transaction goes through 3 chains: Ethereum: the source chain, Poly: the relay chain, and Starcoin: the target chain.
As shown in the figure, this is what happens when the transaction finally succeeds in the Finished state on the test network:
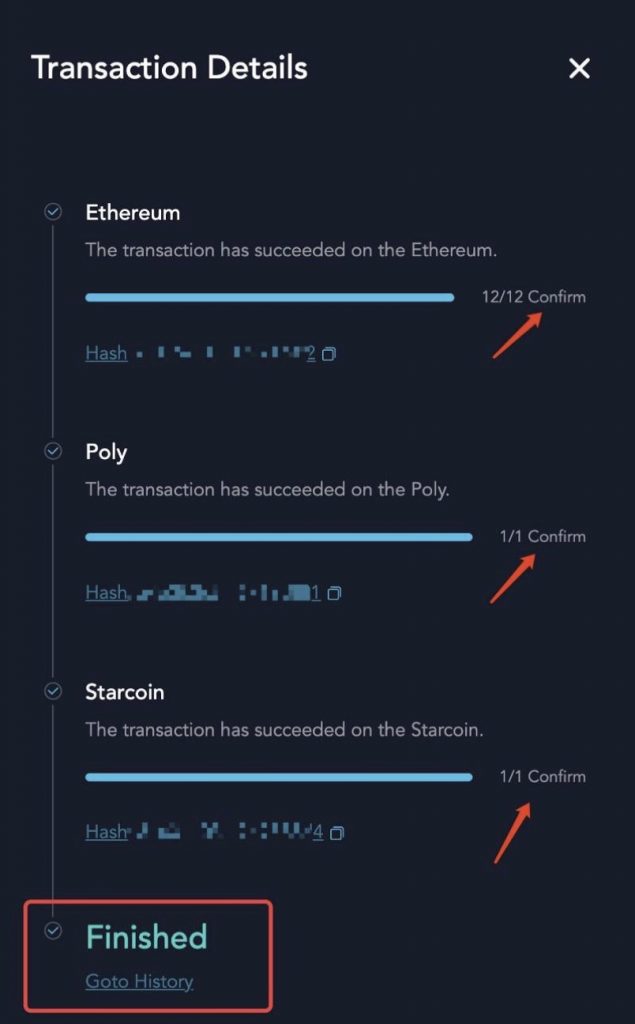
Click on the Goto History hyperlink above to view the details of the transaction as shown in the image.
7. Confirm cross-link success
Let’s check the two wallets of Ethereum and Starcoin separately to check if the cross-chain is successful.
You can check Starcoin’s account balance, as shown in the graph, the balance of XUSDT should have increased (10 XUSDT):
Looking at Ethereum’s account balance, the USDT balance should have decreased (10 USDT). This confirms the success of the cross-chain.
Starcoin completes ecological upgrade and enters the application explosion period
The previous step-by-step analysis shows how to cross-chain from Ethereum to Starcoin and easily cross-chain Tokens from Ethereum to Starcoin.
Starcoin has developed a series of standard protocols, such as NFT protocol, and Oracle protocol, by leveraging Move’s native advantages. On top of this, Starcoin ecology has spread out in several tracks, such as Swap, NFT, Stablecoin, Gaming, etc., to take the lead in achieving breakthroughs. starcoin ecology has taken shape.
With the landing of Bridge, Starcoin has realized the initial layout of infrastructure, completed the upgrade of ecology, and is about to transform into the stage of ecological application explosion and reach the scale effect.